Over The Top Chili Review!
Share
Over the Top Chili Review!
We’ve been seeing a lot of recipes and people suggesting a non traditional method for chili called Over The Top chili.
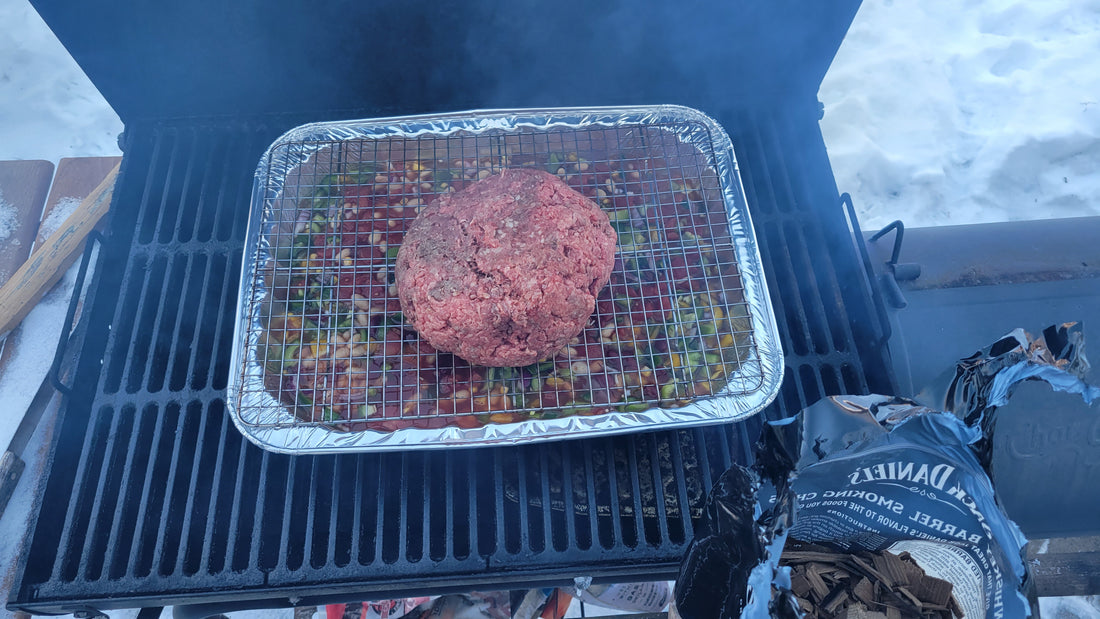
The premise of the technique is that the meat used in the chili is smoked above the rest of the ingredients for a few hours before eventually being added to the pot with the rest of the ingredients.
Now traditional chili making has the meat cooked first, then placed in the pot right away.
We were intrigued by this method and searched the internet for a popular recipe to try out. We found this one and gave it a try. I’ll say I had some high hopes, but there are definite pros and cons to this method (which I’ll share at the end).
We also will share some ideas and things we would do differently if we do it again.
Enjoy!
Over The Top Chili
Yield: 20 servings
Prep time: 30 min
Total time: 4 hours
Ingredients:
Instructions:
Set your smoker or grill up for indirect cooking at 300 degrees
Dice all vegetables and add all ingredients, except meats into a lodge cast iron (we used a large tinfoil pan)
Add a small cooking grate over the tinfoil pan

Add your ground beef in a tight ball shape on top of grate (before we did this, we mixed the beef together in a bowl and placed it in the refrigerator for about 20 minutes to help shape it)
Add all to grill and cook @300-325 until the int meat temp is 120 internal temperature

Add your sausage and continue cooking until the meat is 150 int. Remove and crumble meat and slice sausage into pot (this is where we added the Johnsonville brats to the top of the grate and let them smoke)

Continue cooking on the smoker for another hour.
Top with shredded cheese and sour cream. Enjoy!!!

Notes:
Pros:
- Super easy to set up and execute. Directions are simple and to the point.
- Don’t have to mess around with cooking the meat separately before hand
- Awesome flavors from the smoke and the added sausage was amazing!
Cons:
- Having the meat above the pan allows the grease to drip into the chili. I don’t mind that much, but if you are looking to keep the grease out, maybe smoke the meat over a separate pan and add later.
- As I mentioned before, it didn’t seem like chili, more like a stew with all of the meat and no chili powder.
- Takes a little more time to monitor the beef temperature as opposed to cooking the beef beforehand and just placing it into the pan together.
- Your guests may think the beef is undercooked because of the amazing smoke ring you get before you crumble the meat.
Overall, I’ll say, it was tasty, but more like a stew and not like chili. If I were to do it over, I’d add the following:
- 2-4 tbsp chili powder
- 2 tbsp Fire In The Hole Spicy Seasoning
- 1 more can of diced tomatoes
If you give it a try, let us know how it goes!
