
How To Use A Charcoal Grill
Grilling On A Charcoal Grill
There's nothing like the smell of a charcoal grill being fired up! We'll break down the best way to get your grill going!

I got started grilling on a propane grill. I picked it up at a local hardware store because it was on sale. To be honest, I never really took the time to appreciate cooking over a fire until I received my first charcoal grill as a gift. I haven’t looked back since!
I’m not saying that charcoal is better than propane, I’m just saying that I love the extra time you have to spend getting the coals ready and the grill up to the right temperature. There are so many different techniques and tools out there to try out.
The downside of charcoal is it’s messy!
Charcoal can also be a bit unpredictable and harder to control the heat (we’ll cover the different types of charcoal in a future article). And if you are cooking for longer than an hour, the coals will need to be replenished.
Overall, charcoal grills require more attention, that’s what makes them so much fun!
If you are short on time, propane is the way to go. If you enjoy the process and have some time, give charcoal a try.
Prepare Your Grill
Empty any old ash first. Ash at the bottom of the grill can reduce air flow and make temperatures hard to control. Air flow is important when cooking on a charcoal grill. The fire will need oxygen to keep going. After the charcoals are placed in the grill, you can control the internal cooking temperature by adjusting the vents: wider vents mean hotter flames and more oxygen, while smaller vents mean a cooler cooking temperature. Never close them all the way or the flames will go out!
Lighting – I’m not going to cover using lighter fluid here. I’m not a fan of grilling over charcoal that has been laced with petroleum products. A cleaner and more ecologically sound way of lighting charcoal is using either an electric or chimney starter.
Electric Starter
The electric starter requires a little less attention than a chimney starter. Just place the coals on top of the lighter and plug it in. Then sit back and wait for the flames! In about 15 minutes the coals will be blazing. The electric starter is easy but doesn’t light the charcoals as evenly as does a chimney starter. Another obstacle is you must have a power outlet nearby.
There are a few variations of electric starters. The most common is a Hot Coil starter (basically a looped heating element). A new advancement in charcoal lighting technology is the hot air electric starter. They are clean, efficient, and have a bunch of newer features like safety casings, quick cool technology, and longer cords. Choose one that works best for you! Amazon is a great place to look.
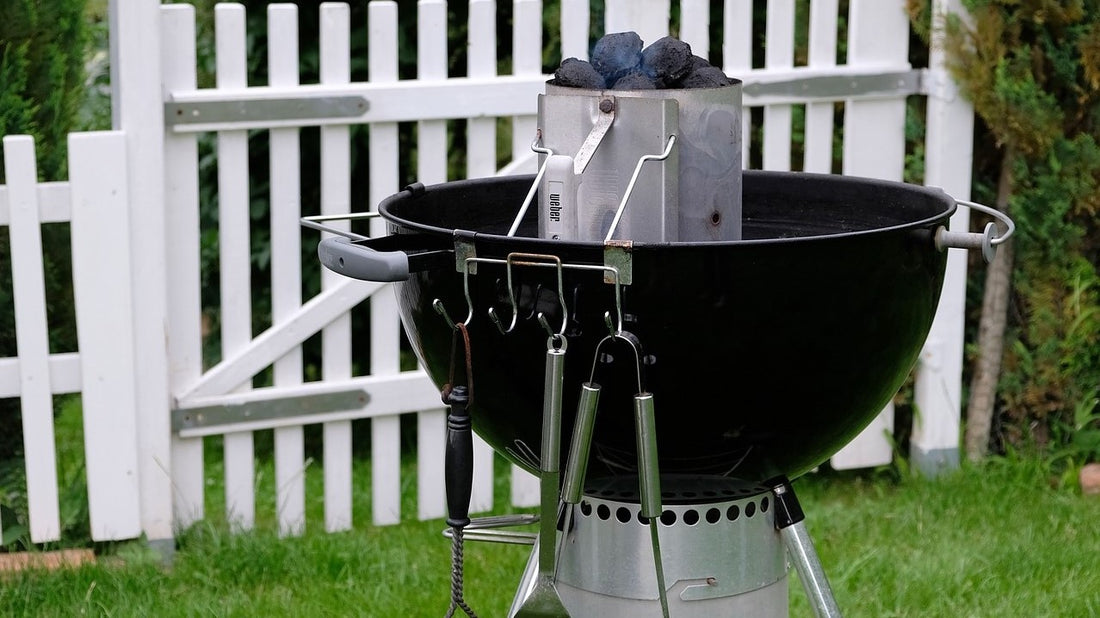
Chimney Starter
The more popular way to get your charcoals going is to use a chimney starter. A chimney is a large, hollow metal cylinder with a wire bottom that the coals sit on.
Stuff newspaper loosely in the bottom of the chimney (there is a space for it under the wire rack), then fill the chimney with charcoal.
Remove the top grate from grill, place chimney inside, and light the newspaper. In about 15-20 minutes you have blazing coals. The coals are ready when all glow orange-red.
When ready, dump the coals from the chimney into the bottom of the grill. It’ll be hot, so be sure to wear a heavy glove protect your hand!

Emptying the Chimney
For your everyday grilling when you are cooking smaller items (think pork chops, burgers, or chicken breasts) a single-zone fire will do the job.
A single-zone fire is when you dump the bright orange coals from the chimney into one single layer at the bottom of the grill. You can use a garden hoe or rake to help spread the coals. (Pro-tip: be sure to leave one corner of the grill without coals as a safety space where you can move food if it starts to burn or over cook!)
If you are grilling larger items, you can set up a 3-zone fire. Put a double layer of coals on one side of the grill (hot zone – great for searing!) and the remaining coals are spread in a single layer in the center (moderately high zone). The remaining area is left without coals (cool zone).
Now’s time to put the top grate of your grill on and get it to the right temperature for grilling!
Getting to the Right Temp for Direct Grilling
After dumping the lit coals into the grill, it will take some time to achieve the desired temperature for the food that you are about to cook.

High Heat (5-10 minutes after dumping the coals) – for quick-cooking foods you’ll want the grill’s surface to be 450-650°F. To gauge the heat, hold your hand about 4 inches above the grill grate, you’ll feel the heat within 1-2 seconds before the heat will force you to remove your hand.
Medium-High Heat (10-15 mins) – for burgers and vegetables you’ll be going for 375-450°F. On the hand test, it's 4-5 seconds.
Medium Heat (15-25 mins) – Good for meats that take a little longer like bone-in chicken. Get your grill around 350°F. It's about 6-7 seconds with the hand test.
Medium-Low Heat (25-30 mins) – This is a great temperature for cooking brats or sausages without making them explode! Here you are looking for a temperature around 325°F. On the hand test, it's 7-10 seconds. Any lower, and you're venturing into barbecue territory (we’ll cover in-direct grilling at another time!)
Cleaning the Grates
Now that you have your coals ready and grill grate is heated up, it’s time to clean the grates. Heating the grill sterilizes the grate and loosens any burnt-on debris. Using a wire brush, brush vigorously to remove any debris. Then take a paper towel soaked in vegetable oil and spread it over grate with tongs. This is the trick to keep food from sticking to the grill. You can also use spray, but make sure to hold the grate away from the fire when you spray (you’ll need heat resistant gloves because the grate will be hot!).
-Word of caution when using a wire brush. There have been instances where the metal brush hairs make their way onto the food and are ingested. By using the towel after using a brush, you can help reduce this chance.
Time To Grill!
You’ve been patient and have your grill temperature right where it needs to be. Now’s the time you throw your food on the grates and let the delicious magic happen! Happy Grilling!
What’s on your grill? Let me know in the comments…
If you enjoyed this post or found it helpful, I’d be very grateful if you’d help it spread by emailing it to a friend, or sharing it on Twitter or Facebook. Thank you!
4 comments
You can also try Pit Brothers BBQ gidgee charcoal for grilling. https://www.pitbrothersbbq.com.au/collections/gidgee-charcoal
The weber lighter cubes are a game-changer for lighting the chimney, you light it and forget it.
https://www.acehardware.com/departments/outdoor-living/grills-and-smokers/charcoal-starters/8212250?store=03902&gclid=Cj0KCQiAyJOBBhDCARIsAJG2h5doPOQIs4gtW-YfIJUBTx4LvrzgKzEr_bdOcKB08idVe48DujauJIgaAmpxEALw_wcB&gclsrc=aw.ds
Nick – Happy to help and glad you found it useful!
Very informative I’m a propane guy because I’m usually in a hurry. I always have food stick to the grate I never thought of using veg oil on it thanks for the tip.